 Bike Stories
Why that tyre is so hard to mount — and how to seat it properly
The last third of the bead is the hard part. The fix is in the two numbers on the tyre and the rim, the order you work in, and the one rim check that comes before any tools.
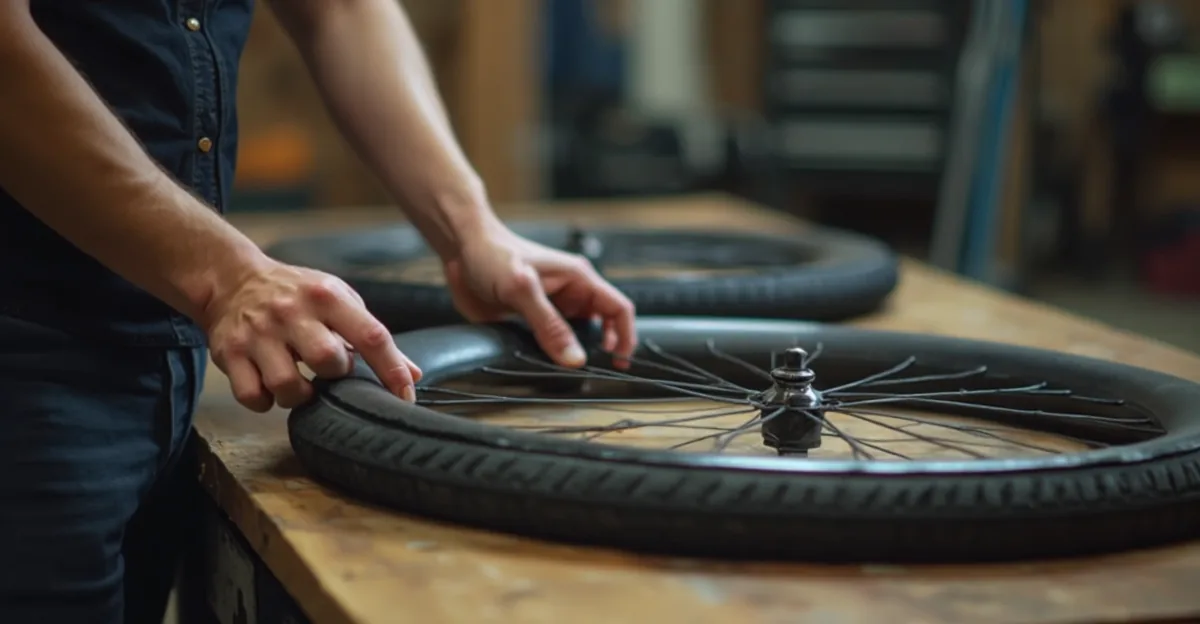
You are on the last third of the bead, thumbs on the rim, and the tyre is not coming over. You have done this a hundred times. It does not feel like the hundred-and-first time.
The hard part is not random. The bead is a circle and the rim is an oval, so the last centimetres of seat-down carry most of the tension in the whole tyre. Everything already seated is stretched slightly to close the gap, and the last section has to do the work that the first two-thirds did together. That is the whole problem, and it is why the fix is never 'push harder'.
What bead tension actually means
The sidewall of a tyre is marked with its width, in millimetres. The rim is marked with a range of widths it accepts, usually in the same millimetre notation. The combination of the two decides how much the bead has to stretch to seat, and that stretch is what your thumbs are fighting — which is also why a tyre that fits its intended rim almost by hand fights you on a rim it was never meant for.
A wide tyre on a narrow rim has high bead tension: the bead has to stretch more to get over the rim edge, and the last third is where the stretch concentrates. A narrow road tyre on a modern narrow rim is the classic case, and it is the case where levers are the normal tool, not a sign something is broken. A wide tubeless tyre on a wide hookless rim has very low bead tension, and the same technique that fights you on a road bike seats almost by hand on a gravel one.
The rim's marking is the number to check first. If the tyre's width is inside the rim's range, the fit is legal and the difficulty is the normal kind — a matter of technique and, on high-tension combinations, a pair of levers. If the tyre's width is outside the rim's range, no amount of technique fixes the fit, and the tyre is the wrong one for that rim.
Check the rim before you touch the tools
Before a lever goes near the rim, the rim gets a minute. With the wheel off the bike and the tyre off, press the rim tape down and run your finger the full way round. You are looking for lifted edges, a pinched valve hole, or tape that is worn through. On a tubeless-ready rim this is where you will find whether the tyre will ever seat at all — a torn or lifted rim tape means the bead never seals, and no amount of technique at the last third changes that.
On a rim with a tube, the tape is less critical to the mount itself, but the same check costs the same minute and catches the rim damage that will show up later as a flat you cannot find. A rim with a sharp inner edge, a dented spoke hole, or a burr on the bead seat will ruin a tube that a clean rim would not, and the damage is invisible until the tube is already punctured. The same 'check the rim before you blame the technique' logic applies to the rest of the wheel — a rim that feels wrong under a tyre is usually a rim with a problem, and the sizing post's lesson carries over: measure what you can measure before you reject what you can adjust.
The order that matters: start at the valve
The valve is the one fixed point on the wheel, and the mount should be worked around it rather than through it. Start at the valve, push the bead over the rim with your thumbs in sections, and work around one side first and the other second. Keep the valve at 12 o'clock until both sides have started to come round to meet it.
Use your thumbs, not fingertips. The bead catches on nails, and a small cut in the inner tube is the price of a fingertip. If the tyre is one you have had trouble with before, and you are using a tube, a short wipe of the bead seat with a damp cloth before the tube goes in cuts the friction at the exact spot where the bead is doing the most work.
When your thumbs stop working, the levers go in. The order is:
- Hook the first lever under the bead at 4 o'clock and push the bead over the rim's outer edge.
- Place the second lever at 8 o'clock, with the valve between the two levers.
- Keep the valve free until both levers are in place, then pull the bead over the rim in short sections, thumb pushing the bead down each side of the rim edge as you go.
The 4-and-8 placement is not decoration. It puts the worst stretch of bead across the part of the rim that is easiest to work on, and it keeps the second lever from accidentally prising the first one out. A lever at 12 and 6 o'clock is the natural instinct and the wrong one — it puts the valve in the middle of the stretch and gives the levers nothing to anchor against.
When the last third still fights back
If the last third will not come over with two levers at 4 and 8 and thumbs pushing, stop and look at the rim, not at your shoulders. The usual reasons, in order of likelihood:
- The tyre is the wrong size for the rim. The tyre's width is outside the rim's marked range, or the rim is one size smaller than the tyre's nominal size. The fix is a different tyre, not more force. A shop can confirm the fit from the two numbers in a minute.
- The rim tape is wrong. On a tubeless-ready rim, tape that is too narrow for the rim leaves the bead well exposed, and the bead catches on the rim's inner lip instead of seating in the well. The fix is a correctly sized tape, which is a cheap part and a twenty-minute job.
- The bead tension is high and the tube is in the way. On a tube rim, a tube that is folded under the bead at a lever point adds resistance exactly where the bead is already doing the most work. The fix is to pull the tube out at the two lever points, seat the bead, and push the tube back in before inflating.
- The rim is damaged. A dented spoke hole, a bent rim edge, or a burr on the bead seat will stop the bead in one specific spot. If the bead always stops at the same place, that is the spot, and the wheel goes to a shop.
A second valve is the cheaper fix than all of the above when the problem is simply bead tension on a high-tension combination. A second valve splits the stretch across two valve points, and the last third stops being the last third. For a commuter bike that gets tyres changed twice a year, a second valve costs less than a trip to a shop and takes less time.
The one thing that is not a mounting problem
A tyre that seats on half the rim and not the other half is not a mounting problem — it is a rim problem. If the bead is riding on the rim's shoulder on one side and in the bead seat on the other, the rim is out of true or the rim's bead seat is uneven. The tyre will come off under load, and the wheel goes to a shop. This is the one case where the answer to 'why is this hard' is 'it should not be on this rim at all'.
The same applies to a hookless rim that has never had a correct tyre on it. Hookless rims rely on the bead being pushed into the rim's profile, and a tyre that is the wrong width for the rim's profile will not seat, no matter how much air you put in. The rim's marking tells you the range; outside that range, the tyre and the rim are not a match and the answer is a different tyre.
The short version
Before you reach for the levers next time, the whole routine in one place — and the same discipline the sizing post applies to a child's bike: measure what you can measure before you reject what you can adjust, which for a wheel means checking the rim and the numbers before blaming the technique.
- Check the rim tape before anything else. Lifted or torn tape is the one thing no mounting technique fixes.
- Start at the valve, thumbs first, levers at 4 and 8 with the valve between them.
- If the last third fights, the tyre is probably the wrong size for the rim, not your hands.
- A second valve is a cheaper fix than a shop trip for a high-tension combination.
- If the bead seats on half the rim and not the other, the wheel goes to a shop — that is a rim problem, not a mounting problem.
The next time you are on the last third of a bead and it will not come over, you are not doing it wrong. The rim is telling you something, and the fix is in the two numbers on the sidewall and the rim, not in your shoulders. And if you have a bike you are keeping for a long time, a note of which tyre is on which wheel and when it was last changed is the kind of detail a maintenance log keeps alongside the rest of the bike's history — Bike Stories does it with local reminders and a per-bike parts list, but a sticker on the seat tube works just as well, and costs nothing.
Common questions
Why is the last bit of a tyre always the hardest to put on?
Because the bead is a circle and the rim is an oval. By the time the last section of bead is trying to seat, everything already seated is stretched slightly to close the gap, so the final few centimetres carry most of the tension in the whole tyre. That is why it gets worse near the end and why pushing harder is the wrong move — the rim, not your hand, is doing the work. Two levers at 4 and 8 with the valve between them, or a second valve, move the worst of that stretch to a spot you can actually work on.
Do I really need tyre levers, or is it just that my hands are small?
It is not the hands. Tyres are designed to be mounted by hand on the rims they are meant for — the tyre's bead tension and the rim's width decide that, and they are both printed on the rim. If a tyre needs levers on its intended rim every time, something is wrong: the rim is a size smaller than the tyre's range, the tyre is one size too narrow for the rim, or the bead tension is high and the tyre was never the right one for that rim. Levers are the normal tool for high-tension road tyres on narrow rims, and for any tyre you have had trouble with before, but they are a workaround for a fit that does not quite match, not a sign you are doing it wrong.
Is it okay to use a tyre lever as a wedge to push the bead over?
No — that is the one move that can do real damage. A lever pried into the bead well of a tubeless rim can tear the tape or the rim's inner lip, and a torn rim is a repair cost that dwarfs any tyre. On a tube rim the damage is less likely but the same idea applies: levers go over the rim's outer edge, not into the rim. If the bead is not coming over with a lever over the edge and your thumbs pushing, the answer is a second valve, a different tyre, or a shop — not more force with the lever deeper in.
How do I know which tyre size fits my rim?
Both are marked in millimetres, and the rim's marking is a range. The rim says something like '23-30' or '19-25' in the rim's width markings, and the tyre says a single number like '700x28c'. The tyre's number has to fall inside the rim's range — 28 inside a 23-30 rim is fine, 25 inside a 19-25 rim is fine, and anything outside that range is a fit that will fight you at the last third every single time. If the rim's range is not legible, a shop can tell you from the rim model in a minute.
Drafted with AI, then reviewed and edited by Robert Jensen before publishing.
Stop guessing when you last did that
Bike Stories keeps the service history, the parts, the mileage and the real cost of every bike you own — on your iPhone, with no account. Free for two bikes; Pro is a one-time $9.99 unlock.

Keep reading
A child's first pedal bike: balance bike or stabilisers
There are three routes to a child's first pedal bike, and two of them are a detour. The one that keeps working starts with two wheels and no pedals.

What size bike a kid actually needs — inseam and standover, not age
Age charts sell bikes; they do not fit them. What decides the size is the child's inseam, the standover gap, and whether they can reach and squeeze the brake levers.