 Bike Stories
A child's first pedal bike: balance bike or stabilisers
There are three routes to a child's first pedal bike, and two of them are a detour. The one that keeps working starts with two wheels and no pedals.
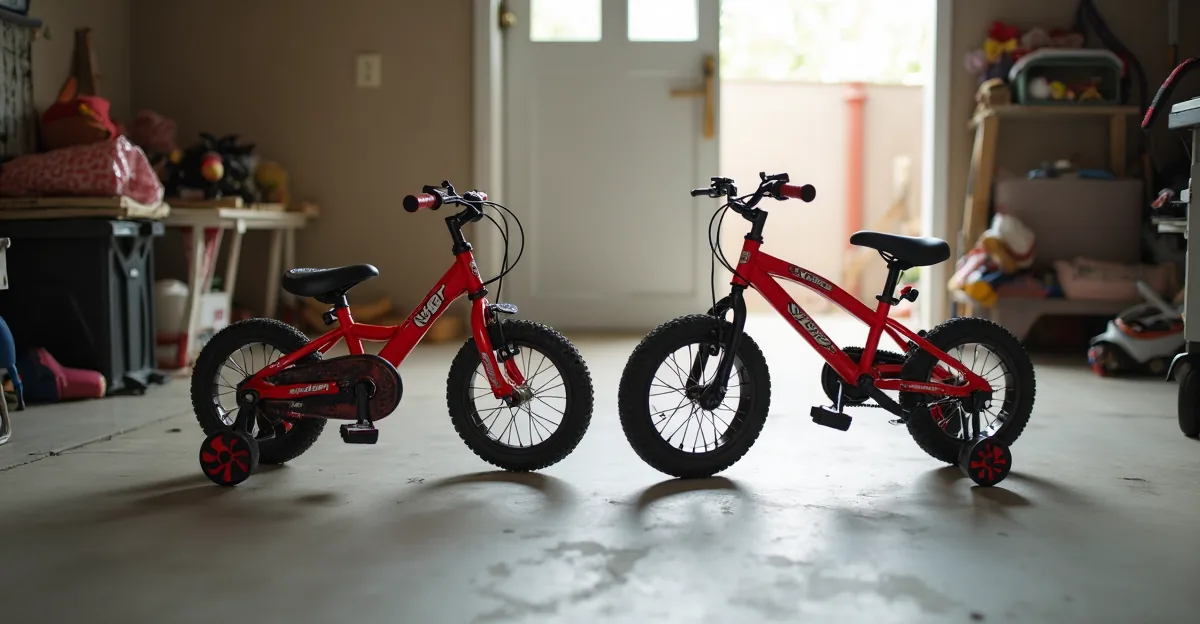
You are holding the box for a child's first pedal bike, and the question is not "will they ride" but how do they get there. There are three routes on the shop floor — a balance bike with pedals added later, a pedal bike with training wheels, or the pedal bike alone — and two of them are detours.
The detours are not failures; plenty of children ride well on training wheels. But the balance-bike route keeps outperforming the others in the one thing parents actually want — the child on two wheels with confidence — and the reason is not mystic. The hard part of riding is not pedalling; pedalling is a motor skill most children have by the time their feet touch the ground. The hard part is balancing and steering while moving, and a balance bike isolates exactly that: no pedals to manage, a low centre of gravity, and feet on the ground whenever the bike stops.
The three routes, what each one teaches
Balance bike first. The child learns to balance and steer at walking pace, then jogs, then runs with feet on the handlebars. By the time they are steady — usually a few weeks of short sessions on flat pavement — the balance and steering are automatic. Adding pedals then means they have a skill to fall back on, and the first ride-off is about one new thing: pushing with the feet. A child who is steady on a balance bike is usually riding a pedal bike within a day or two of the first session.
Training wheels. The child learns to pedal a bike that cannot fall over. The problem is that the assumption "this bike cannot fall over" is exactly what has to be removed before two-wheel riding works, and removing it is a second learning task stacked on top of the first. Children on stabilisers can spend months steady at one pace and then stall when the wheels come off, because the balance skill was never built — it was outsourced to the stabilisers. The route still works; it just tends to take longer, and the transition is a harder moment than the balance-bike one, which is short and quiet.
Straight to a full pedal bike, no aids. This works for some children, usually the older ones who already have balance from running and scooters. For most three- and four-year-olds it is too much new input at once: pedalling, balancing, braking and steering, all from zero. The result is not usually a crash, it is a child who is overwhelmed, and the bike ends up in the shed for a few months until they are ready. That is fine — but it is a longer detour than the balance bike.
When the balance bike is "done"
The readiness sign is specific and observable: the child picks up both feet for a second or two while coasting, without looking down at their feet. Not a hop, not a drag for balance — a genuine coast with both feet up. If that is happening, the pedal bike is the next step. If they are still glancing down at their feet, give the balance bike a few more weeks; the pedal bike will be waiting.
Age is a weak guide here. Most children hit this between two and a half and four and a half, and a child who is steady at three and a half is ready then, whatever the box says. A child who is not steady at four and a half is not late — they need more balance-bike time, and the pedal bike is not the thing that fixes that.
The first ride-off
This is easier than it looks if the setup is right, and harder than it looks if it is not.
Set the saddle at or below the inseam. Measure the inseam the way you would for any child's bike: barefoot, standing against a wall, a flat book slid up to the crotch, floor to book. On the first ride-off the saddle sits at or a centimetre or two below that number, so the child can put both feet flat on the ground from the saddle. It will look too low to adults. It is not. The skill being learned is pedalling, and a foot on the ground is the safety net that makes a wobble survivable rather than a fall.
The session then runs in four moves, and a working version takes five minutes:
- Walk the bike to speed first. Start from standing, one hand on the handlebars, the other on the back of the saddle, and walk the bike to a gentle roll. This is the same move the balance bike taught — feet on the ground, hands on the bars, moving forward — and the pedals get in the way of it, so the first sessions are slow and stop-start. That is normal and not a sign anything is wrong.
- One pedal at a time. While rolling slowly, ask the child to put one foot on a pedal and push once. One leg at a time keeps the other foot on the ground, so the child never has to balance on two feet simultaneously. A few one-pedal pushes at low speed is the whole first lesson.
- Then two feet. At the same slow speed, ask them to put both feet on the pedals and push. If they wobble, they put a foot down, and that is the correct outcome.
- End on a win. Repeat until a few metres on two feet happens without a foot down, and stop the session there. A five-minute session that ends on a win is worth more than a thirty-minute one that ends on the grass.
The brake check that matters most on a first pedal bike
A new child's hand is weaker than the adult's that set the cable, and a brake that stops the bike at the last moment of the lever's travel is not a brake that stops the bike in time for a small child. The check: the child's own hand, not yours, stops the bike firmly before the lever reaches the grip. A small child should be able to get their whole hand around the lever and squeeze it hard; an older one, two fingers.
If the lever reaches the grip before the brake bites, the reach-adjust screw at the lever's pivot brings the lever closer to the bar — most children's bikes sold through bike shops have one, a small Phillips or 2–3 mm Allen head. Wound all the way in and the lever still hits the grip, the cable needs taking up, which is worth handing to a shop: the brakes are the one system on a child's bike where a bad adjustment has real consequences, and a soft brake on a child's bike is a safety item, not a tuning preference.
A front brake is the most important brake on a child's bike, because it is the one that stops the front wheel, and a wobble in the front wheel at low speed is the most common first-riding scare. V-brakes or cable disc brakes both work at this level; a hydraulic disc is unnecessary and harder to adjust. Set the front brake to stop the bike without locking the wheel — a locked front wheel at low speed tips the bike forward, which is the exact fall you are trying to avoid — and if it feels grabby, have the shop soften the bite. Then the child's hand tests the brakes after the first ride, the same way you tested them before it: the child's own squeeze, not yours, is the test that counts. A soft tyre is the other half of the problem: an under-inflated small wheel rolls wobbly in a way a child cannot correct, and the tyre-change post covers how to seat a tyre properly so it holds pressure.
The four things to check before the first ride
Before the child gets on for the first time, with the wheel chocked:
- Tyres fully inflated. Pump to the pressure on the sidewall and check they hold it overnight.
- Brakes bite before the levers reach the grips, and the child's own hand can do it. The adult squeeze test misses this.
- The saddle drops to the first-ride-off height. The lowest saddle position must be at or below the child's inseam; if the post will not drop that far, the frame is too big for a first ride-off, and a smaller frame is the fix, not a longer post.
- The drivetrain is quiet. A new kid's bike should have no chain slack and no creak. If it skips, it is not a ride-off condition; it is a shop fix before the child ever gets on.
Write the inseam and the saddle height down when you set them, and the next adjustment is a lookup rather than a guess. A notebook does this perfectly well, and so does an app like Bike Stories, which keeps a reference setup sheet next to each bike's service history so the same page holds the next child's settings too. What matters is that the number lives somewhere other than memory — a bike that moves to a younger sibling arrives with settings nobody wrote down, and the setup that was right for the older child is usually wrong for the younger one.
The short version
- Balance bike first. The pedals are the easy part; the balance is the hard part, and the balance bike isolates it.
- Readiness sign: both feet up for a second or two while coasting, without looking down.
- First ride-off: saddle at or below the inseam, both feet flat, one pedal at a time, then two feet.
- Brakes: the child's own hand stops the bike before the lever reaches the grip; if not, the reach screw, then a shop.
- Check tyres, brakes, saddle height and drivetrain before the first ride — five minutes, and the session is about riding, not fixing.
Common questions
Are training wheels bad for a child learning to ride?
Not dangerous, but they teach a different and harder skill than the one they will eventually need. A child on stabilisers learns to pedal a bike that cannot fall over, and then has to unlearn the assumption that it cannot fall over before they can ride without them. A balance bike teaches the part that is actually hard — balancing and steering while moving — and the pedals are added on top of a skill they already have. If a child is on stabilisers and making steady progress, keep going; the route still works, and a child riding well on them is not in danger from them. If a child is on stabilisers and has not progressed after a couple of months, a short balance-bike session usually closes the gap in a few weeks.
What age is a child ready for a pedal bike?
Age is a weak guide here — what decides readiness is whether they can balance on a balance bike while moving, not their birthday. Most children do it between two and a half and four and a half, and a child who is steady on a balance bike at three and a half is ready for pedals then, whatever the box says. The readiness sign is that they can pick up both feet for a second or two while coasting without looking at the ground. If that is happening, the pedal bike is the next step; if they are still glancing down at their feet, give the balance bike a few more weeks.
How high should the saddle be on a first pedal bike?
Lower than feels efficient. On the first ride-off the saddle sits at or just below the inseam — the child stands barefoot against a wall and a flat book is slid up to the crotch, and the saddle is set a centimetre or two below that number — so both feet reach the ground flat from the saddle. This looks wrong to adults and feels wobbly to the child, but the skill being learned is pedalling, and a foot on the ground is the safety net that makes the wobble survivable. Raise the saddle a centimetre at a time over the following sessions, and once they are confident set it so the ball of the foot touches the ground at full pedal travel, which is also where pedalling gets efficient.
Which brakes does a first pedal bike need, and which check matters most?
A front brake is the most important brake on a child's bike, because it is the one that stops the front wheel, and a wobble in the front wheel at low speed is the most common first-riding scare. V-brakes or cable disc brakes both work at this level; a hydraulic disc is unnecessary and harder to adjust. The check that matters most is that the child's own hand can stop the bike: a small child should be able to get their whole hand around the lever and squeeze it hard, and the brake should stop firmly before the lever reaches the grip. If it does not, the reach-adjust screw at the lever's pivot brings the lever closer to the bar, and if the lever still hits the grip, the cable needs taking up by a shop. Do this before the first ride-off, not after.
Drafted with AI, then reviewed and edited by Robert Jensen before publishing.
Stop guessing when you last did that
Bike Stories keeps the service history, the parts, the mileage and the real cost of every bike you own — on your iPhone, with no account. Free for two bikes; Pro is a one-time $9.99 unlock.

Keep reading
What size bike a kid actually needs — inseam and standover, not age
Age charts sell bikes; they do not fit them. What decides the size is the child's inseam, the standover gap, and whether they can reach and squeeze the brake levers.
Bike wheel rattling: hub and bearing wear, checked in ten minutes
A wheel that wobbles or spins down fast has bearings, not a rim, at fault. Two checks take ten minutes, and the answer decides whether you need grease, a service, or a new hub.